5 Handy Ancient Utility Line-ups in Counter-Strike 2
| Tags: CS2
| Author The Old One
Here is a list of Five instrumental Ancient utility line-ups that will win you matches in Counter-Strike 2
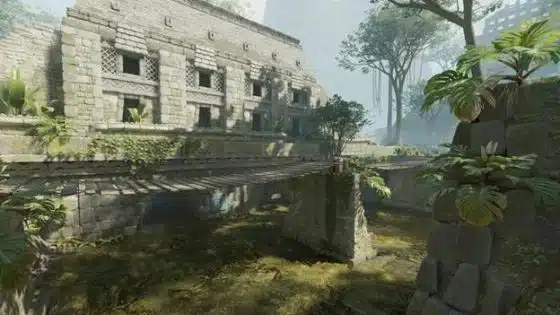
Ancient has been a map many players have felt conflicted about since its introduction back in CS:GO. It has had its fair share of controversies; some players love it and others wish it rather be removed completely. Despite all that, the map has stood the test of time and has been re-introduced in Valve's latest edition of the Counter-Strike franchise, CS2. With loads of visual improvements and revamped aspects, the map has evolved. Because of these changes, the line-ups that have been developed by the community are now lost. But the changes also bring opportunities to find newer line-ups and re-discover old ones. As Ancient places a lot of emphasis on map control and well-planned executions, players have swarmed to find the best and most effective utilities for this map.
So we have decided to compile some of the best and most useful line-ups for Molotovs and flashbangs for this map to help players for their competitive games in CS2. As utility is vital for many default setups, it is advised to try out these lineups before going into a game in the map of Ancient in Counter-Strike 2.
Contents
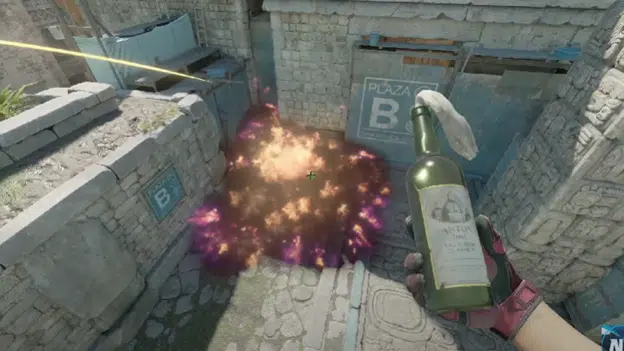
Ancient Utility Line-ups for Clearing Donut Molotov
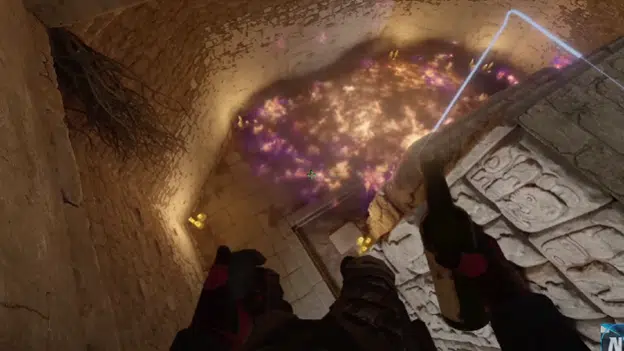
Mid to Donut
The A-Site is a very difficult site to get into, especially for the T-side on their initial execution. There are too many potential positions for the CT players to be in. To execute the site efficiently, map control is needed from Donut. Having two fronts for entry allows the players to walk in more easily and throw smokes from different positions. So establishing control over Donut is very important. Due to its high value, there is almost always a CT player present there. So that player must be taken care of before pushing in.
Credits: NartOutHere
Immediate Effects
This Molotov covers the back area of Donut. Any player holding this area against Mid will most probably be hiding there. As a large area will be covered in flames, the player is forced to push out and be easily taken out. It is also common for a second player to hold the right-side angle to try and trade his teammate. So it is important to be prepared for that as well.
Available Options
- Push Donut and take control
- Double execute to the A-Site.
- Throw supporting nades.
- Use control as fake and rotate to B.
- Lurk to A during late rounds.
A Site Flash for AWPers
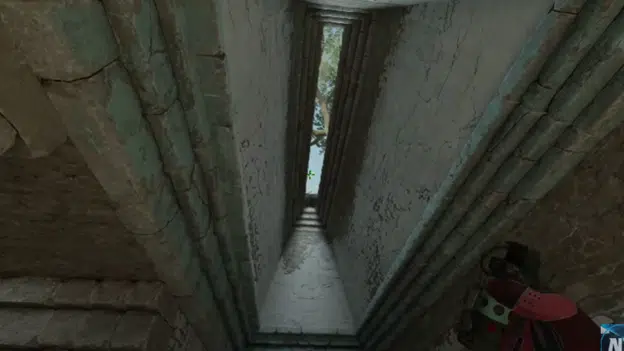
A-Main to above A-Site
Due to the vastness of the A-Site and all the deep angles, it is very risky to simply walk in. It is also a nest for AWPers to hold in. Due to its defensive potential entering without proper flashbangs is quite dangerous. Default smoke grenades aren’t enough to completely block off the players inside. Even without an AWPer two CT players can do some decent damage to attacking players with decent coordination.
Credits: NartOutHere
Immediate Effects
The flashbang pops just above the site, this causes almost anyone in the plant site to be blinded. All deep and sneaky angles will be covered by this. With additional smokes toward Temple and CT, the blinded players will be vulnerable and forced out of their positions. This will cause the CT to go for a late retake and wait for rotations.
Available Options
- Walk into A and take out blinded players.
- Establish control in Donut for strong post-plant.
- Fake to B by throwing additional utility to draw players here.
- Fast rotate out through Donut to Mid to B.
- Get additional kills by flashing into Temple.
Behind Box A-Site Flash for Donut
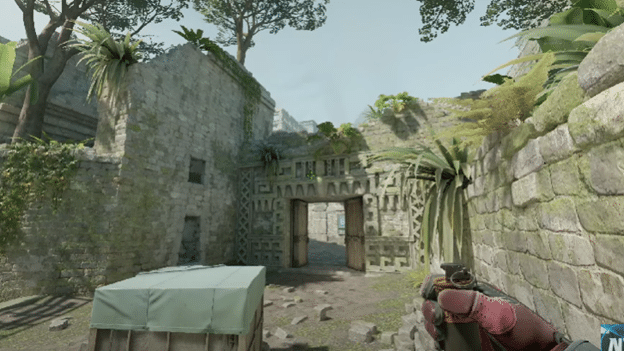
A-Main to Donut Entry
There are numerous cases where the T-side finally executes a round at the very end phases of the round. This happens due to a lack of map control. As Ancient gives a much easier time to CT players to hold these crucial positions, the T player often fails to take over. They end up going for a hail-mary push. It is common for the CT side to hold from Donut entry if such a push occurs. It is a very effective rat angle to play from and is must clear for the Terrorists in this situation.

Credits: NartOutHere
Immediate Effects
As the area outside of Donut towards the A-Site is tough to access from A-Main, any player positioned there from the CT side can do serious damage to the late-round push. For that specific reason, this flash is so important. It will blind the right side of the A-Site and focus toward the Donut side entryway. This allows the Terrorists to clear out the angle and take out the players on the site. The flash pops behind the Big Box in front of Temple and does not affect the players rushing inside. So once learned this can be very effective for late site executions for the T side when there is no Donut control.
Available Options
- Walk into A and take out blinded players.
- Establish control in Donut for strong post-plant.
- Fake to B by throwing additional utility to draw players here.
- Fast rotate out through Donut to Mid to B.
- Get additional kills by flashing into Temple.
B-Site Flash by m0NESY
Outside B-Doors to above B-Site
The B-Site also has many avenues to check before any execution can be carried out. There are more angles here to cover than smoke line-ups available. For this reason, the B-Site pushes in Ancient are much more messy. Due to the multiple angles and close-ranged positioning, Terrorist sided players always struggle here. Dependable utility is a must to be able to plant the bomb here and default smoke grenades just don’t do enough to ensure a safe entry.
Credits: NartOutHere
Immediate Effects
Pro player for G2 Esports, Ilya “m0NESY’ Osipov, has used this flash in one of his default strategies. The flash covers a decent chunk of the site. This allows T players to safely enter and clear out numerous positions. All areas like Ninja, outside Cave, and B-Short are covered. This also isolates anyone pushed up B-Long to fight alone.
Available Options
- Clear Short and Long.
- Flash through into Cave for additional kills and control.
- Late lurk from Construction to Cave.
- Default plant for aggressive post-plant.
- Open plant for passive post-plant.
B-Site Ninja Molotov
Outside B-Doors to B-Site Ninja
Ninja is one of the sneakiest places to hide in the B-SIte. Even though it is a very common place to play as a CT, it is often missed by a pushing Terrorist team due to the close-ranged fights and Chaos. As it can be easily forgotten and left uncleared, it is essential to use some form of utility to ensure the team's safe push.
Credits: NartOutHere
Immediate Effects
Players around Cave and Short will be forced to push back, and additional smokes and flashbangs will isolate the player in Ninja. The pressure will force the player out and make him vulnerable. The barrage of utility will also force the CT to fall back behind smokes.
Available Options
- Clear Ninja.
- Push Cave for more control.
- Lurk to Cave.
- Push Short or Long.